
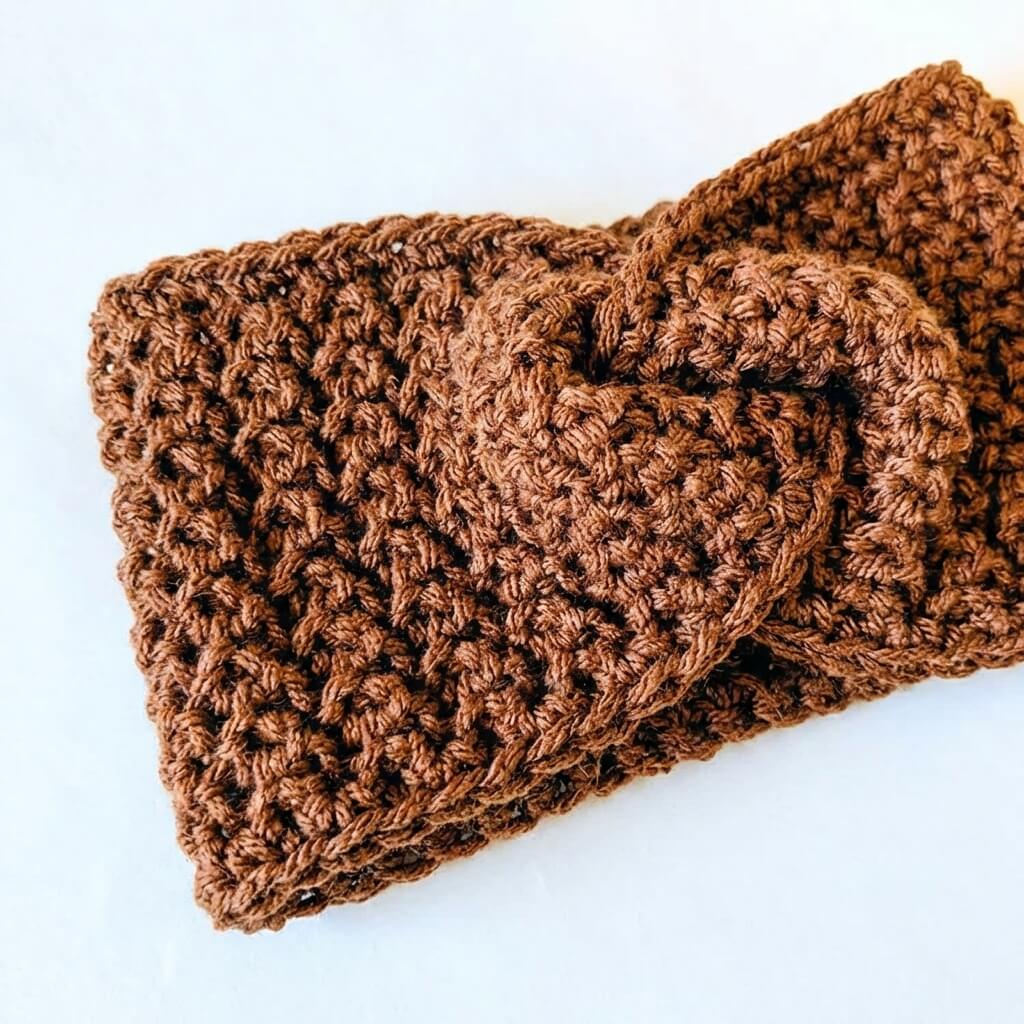
If you are searching for a quick and cozy crochet project that can be completed in a short amount of time, look no further than the Chestnut crochet ear warmer. This pattern is simple and easy to follow, designed specifically for bulky weight yarn. This choice of yarn provides a thick, plush feel that is especially ideal for those chilly days when you need a bit of warmth and comfort.

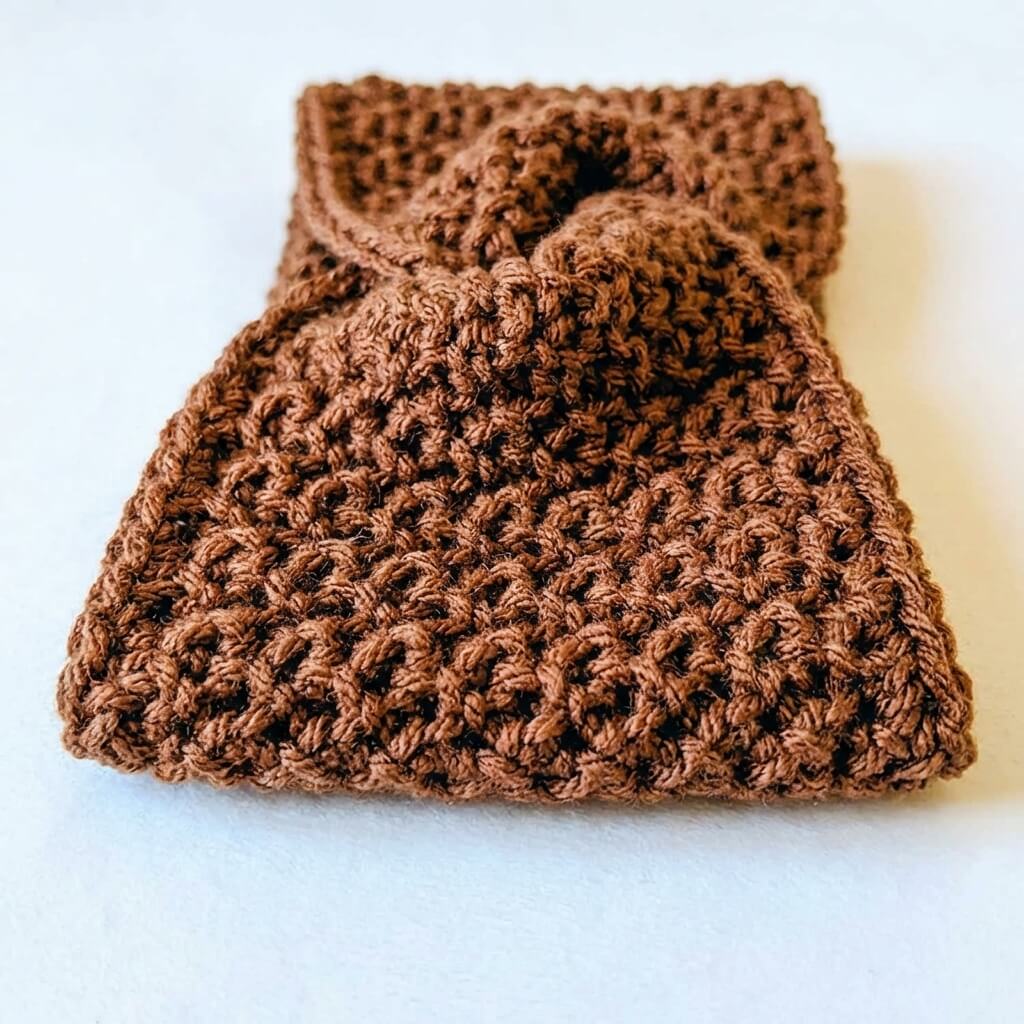
This ear warmer has been designed with simplicity and practicality in mind. It can be completed in approximately one hour, making it an excellent option for last-minute gifts or a quick weekend project. The one-size design is intended to fit adults with a head circumference of 21 to 22 inches, ensuring a secure and comfortable fit that you will want to wear throughout the entire winter season.
Materials needed for this project include:
- 100 yards of #5 bulky weight yarn. For this project, I used Brava Bulky Yarn, which is soft and warm.
- A US size K crochet hook (6.5 mm) to work with the bulky yarn.
- A pair of scissors to cut the yarn as needed.
- A tapestry needle for weaving in the ends once your project is complete.
The approximate size of the finished ear warmer is: 9 inches long and 5 inches wide, accommodating an adult head circumference of 21 to 22 inches.
Gauge for the ear warmer (4 inches by 4 inches) is approximately: 8 single crochet stitches and 6 rows.
Important notes regarding the pattern:
- The chain one at the beginning of each row does not count as a stitch.
Below are the abbreviations used in this pattern (U.S. terminology):
ch – chain
st(s) – stitch(es)
sc – single crochet
sc blo – single crochet worked in the back loop only
sc flo – single crochet worked in the front loop only
RS – right side of the work
Chestnut Ear Warmer Crochet Pattern
For Row 1: Begin by chaining 17 stitches. Work one single crochet into the second chain from the hook, and continue with one single crochet in each chain across the row. Once completed, chain 1 and turn your work. This will give you a total of 16 stitches.
For Row 2: In this row, you will work a single crochet in the back loop only for the first stitch, followed by a single crochet in the front loop only for the next stitch. Repeat this pattern of working one stitch in the back loop and the next in the front loop until you reach the end of the row. Chain 1 and turn your work again, maintaining a total of 16 stitches.
Continue by repeating Row 2 until you have completed a total of 50 rows. If you prefer a wider headband, feel free to add more rows to your project.
Add the Border
With your yarn still attached at the end of your last row, chain 1 and proceed to single crochet around the entire edge of the ear warmer. When you reach a corner, place three single crochets in that corner stitch. Upon returning to your starting corner, again place three single crochets in the same stitch. It is essential to note that the side currently facing you is considered the right side of your ear warmer.
Once you have finished the single crochet border, fasten off the yarn, leaving a long tail for sewing the ends together later.
How to Create the Twist
Step 1: Start by laying the completed piece flat horizontally with the right side facing up.
Step 2: Fold each end in half with the right side facing: first fold the left end in half lengthwise, bringing the top edge down to meet the bottom edge. Repeat this process with the right end.
Step 3: Interlock the ends by sliding the folded left and right ends together. You should now have four layers stacked on top of each other.
Step 4: Using the long tail end of your yarn and a tapestry needle, sew through all four layers, moving back and forth from one side to the other to secure them together.
Step 5: Finally, turn the ear warmer inside out. When you do this, the seam will be hidden, and you will reveal a beautiful twisted effect on the outside.