
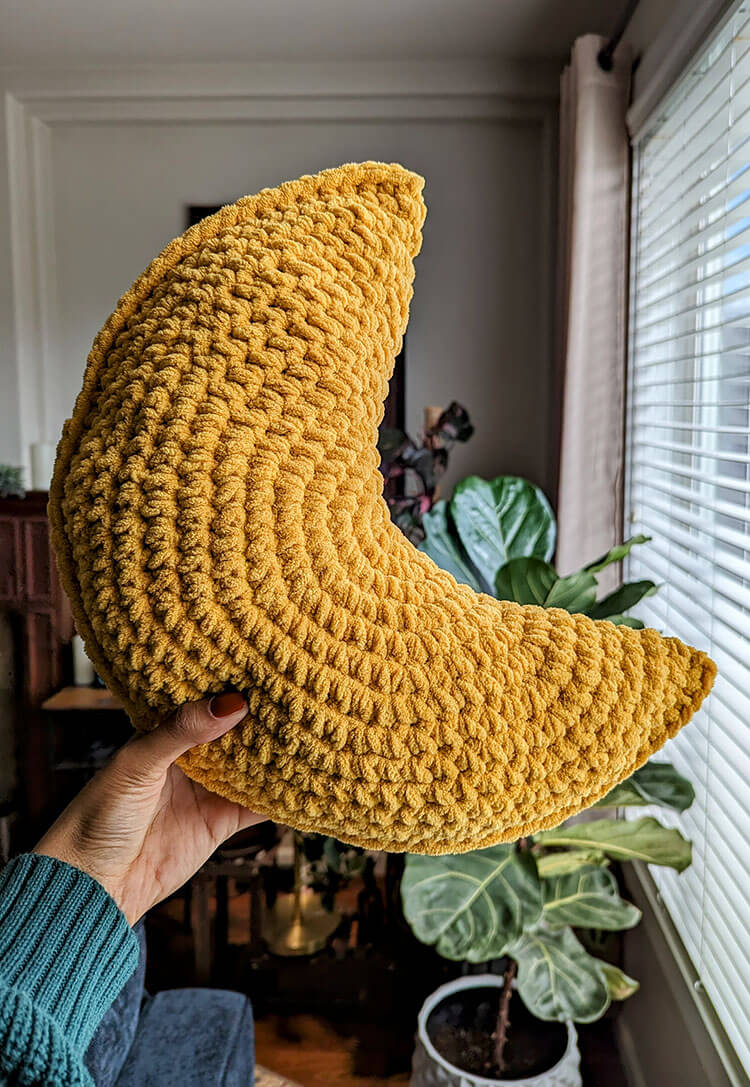
I am excited to share a delightful crochet pattern for a cozy moon pillow that will add charm and personality to any space in your home. This project is perfect for beginners who are eager to create something that is both simple and enjoyable. If you are looking for a fun and easy crochet project, this moon pillow is definitely the right choice for you!

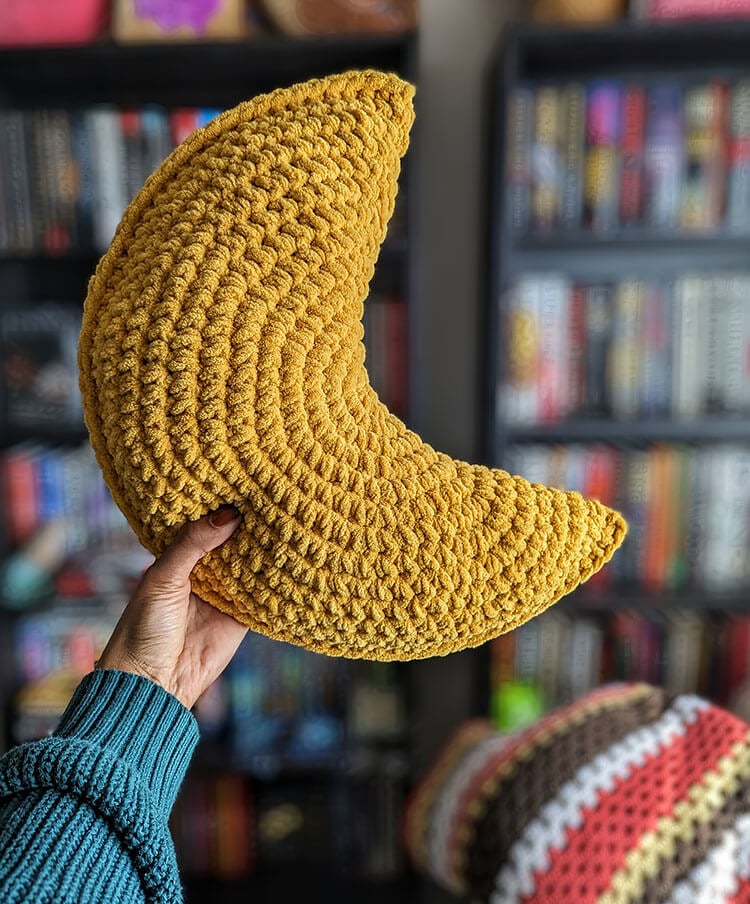
Transform your space into something out of this world with this unique moon pillow crochet pattern. This guide will take you through step-by-step instructions to help you create your own cozy crescent moon pillow. It’s suitable for all skill levels, making it an excellent project even if you are just starting to crochet. You can select your favorite yarn colors to craft one or several of these adorable pillows, enhancing the look of any room.
Materials Needed:
Size: This pillow will measure approximately 15 inches tall.
Pattern Notes:
- We will be working in continuous rounds, so please do not join at the end of each round to preserve the flow of the design.
- You can use any yarn and hook size of your preference. Just remember that the type of yarn and the size of the hook will influence the final size of your pillow.
- If you want a smaller pillow, you can reduce the number of rounds. For a larger pillow, simply add more rounds, making sure to maintain the correct stitch count for each round.
Abbreviations Used (US terms):
ch – chain
st(s) – stitch(es)
sl st – slip stitch
sc – single crochet
inc – increase (work 2 stitches in the same stitch)
Would you like to print the pattern? You can purchase the ad-free printable PDF from my shop.
Moon Pillow Crochet Pattern
To start, chain 2.
Round 1: Crochet 10 single crochets into the second chain from the hook (total of 10 stitches).
Be sure to place a stitch marker in the first stitch of each round. This simple step will help you keep track of when you are beginning a new round, making the process much smoother.
Round 2: Make an increase in each stitch around the circle. This will give you a total of 20 stitches.
Round 3: *Increase, then single crochet in the next stitch.* Repeat this sequence around the circle, resulting in 30 stitches.
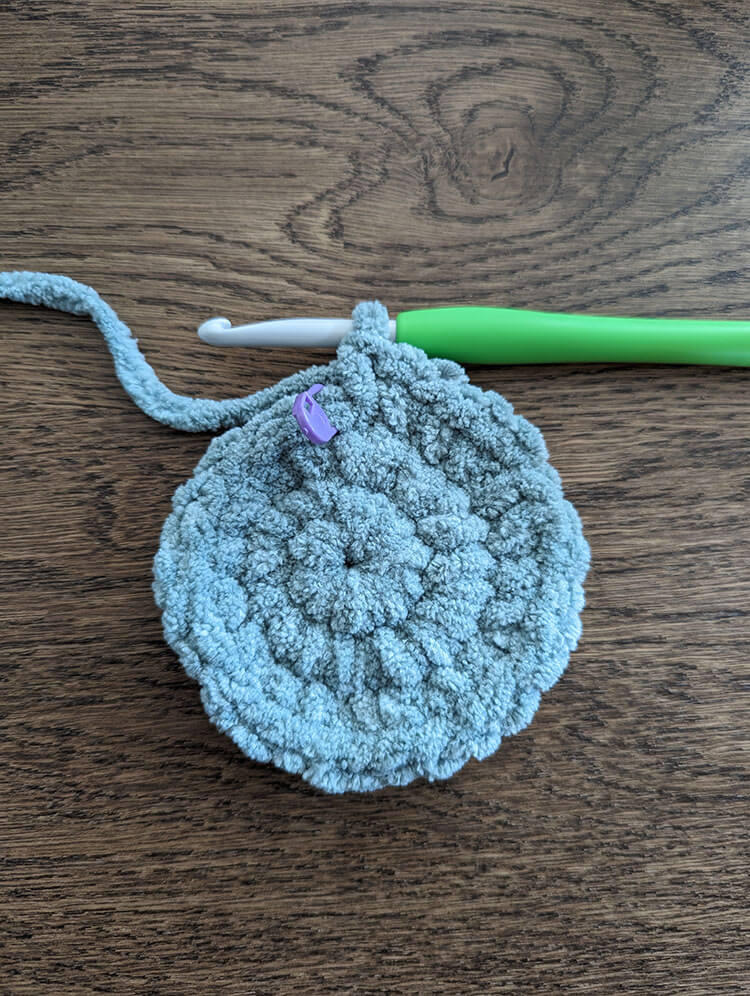
Round 4: *Increase, then single crochet in the next two stitches.* Continue this pattern around for a total of 40 stitches.
Round 5: *Increase, then single crochet in the next three stitches.* Repeat this pattern to yield 50 stitches around.
Round 6: *Increase, followed by single crochet in the next four stitches.* When you have completed this round, you should have 60 stitches in total.
Round 7: *Increase, then single crochet in the next five stitches.* This will give you 70 stitches total at the end of the round.
If your circle begins to look a bit wavy, do not worry – that is a normal part of the process!
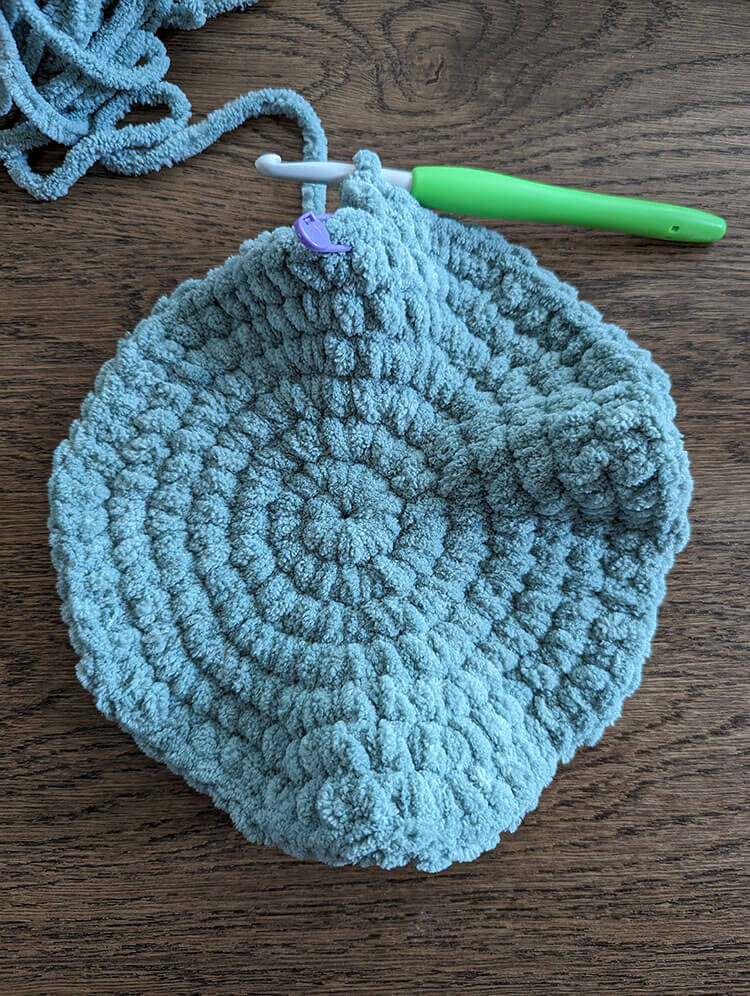
Round 8: *Increase, then single crochet in the next six stitches.* Repeat until you complete the round to arrive at 80 stitches.
Round 9: *Increase, followed by single crochet in the next seven stitches.* Repeat around for a total of 90 stitches.
Round 10: *Increase, then single crochet in the next eight stitches.* This round will yield 100 stitches.
Round 11: *Increase, then single crochet in the next nine stitches.* Finish this round with 110 stitches total.
Round 12: *Increase, single crochet in the next ten stitches.* After this round, you should have 120 stitches.
Round 13: *Increase, then single crochet in the next eleven stitches.* This will complete the round with 130 stitches.
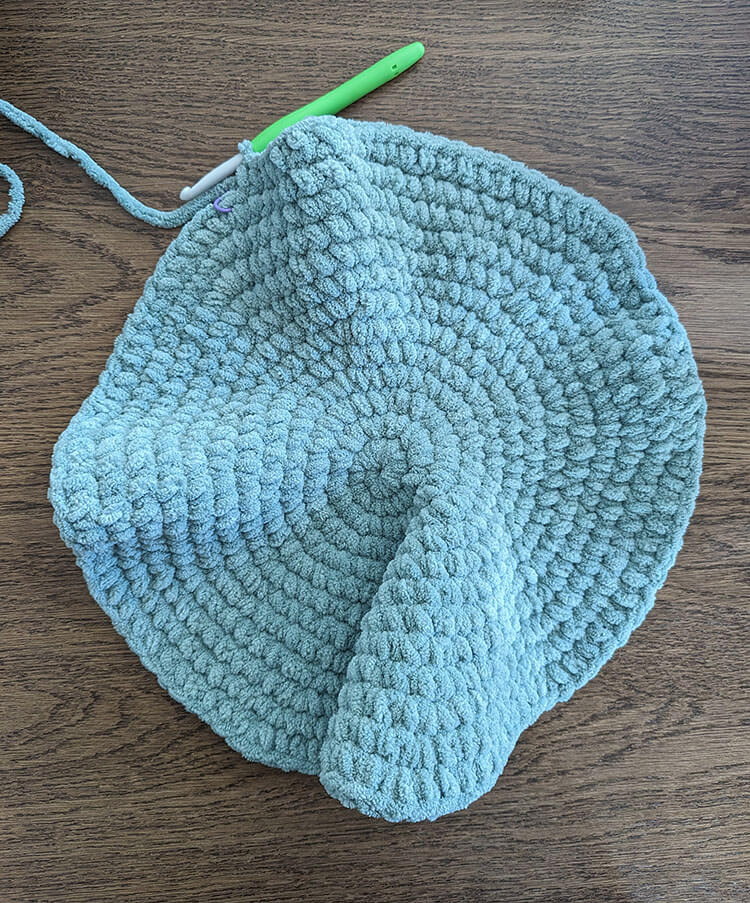
Round 14: Single crochet around the entire base, then slip stitch to the first stitch. Do not fasten off at this point, as we will proceed without cutting the yarn. You should still have 130 stitches at the end of this round.
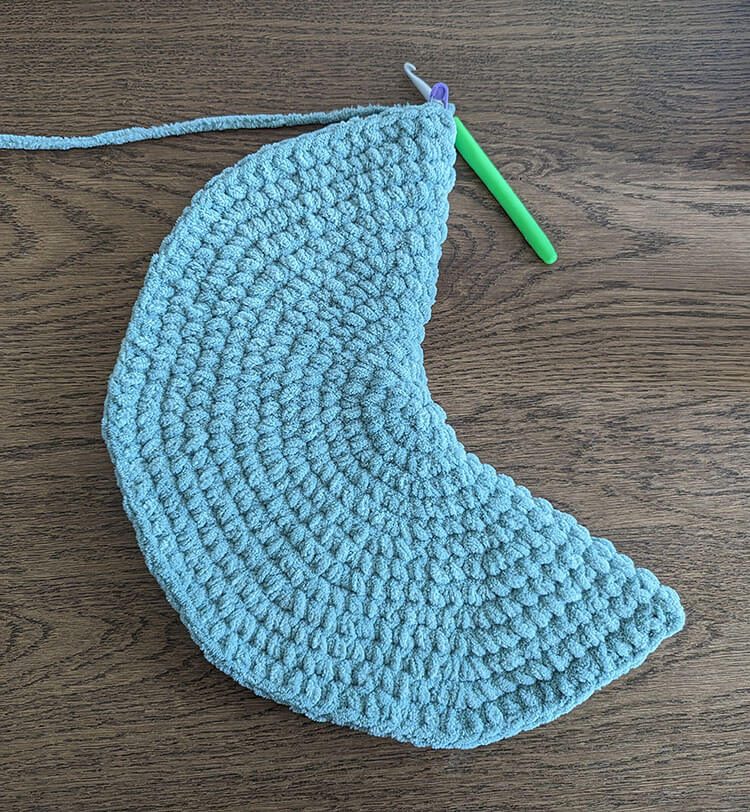
Next, gently fold your moon in half so that the wrong sides are facing one another. Align the outer edge stitches and begin to single crochet the sides together.
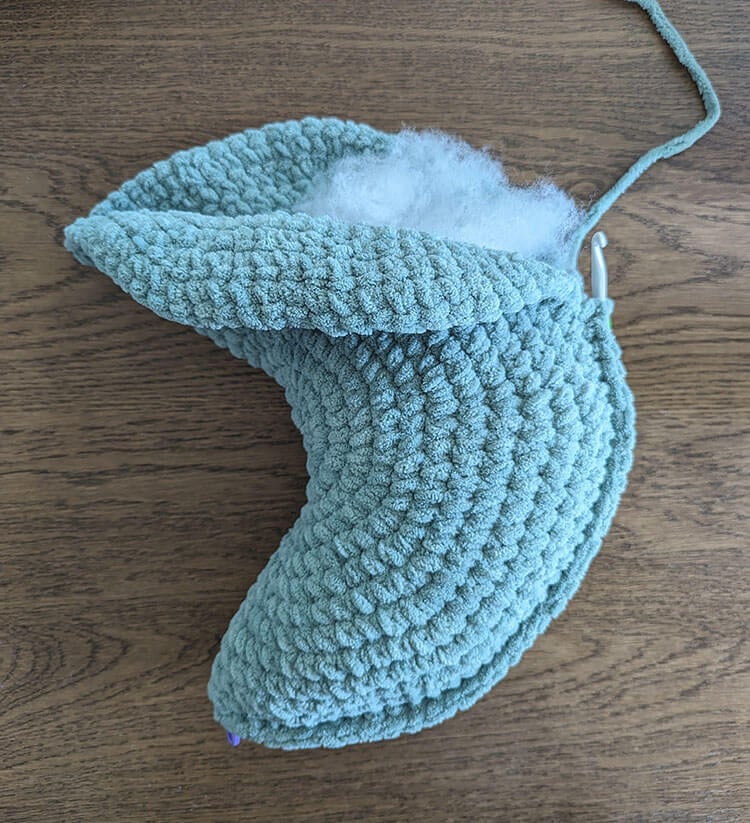
As you work your way around, begin to stuff your moon with poly-fil about halfway through. Continue crocheting the moon together while adding more poly-fil as needed to achieve your desired firmness. Once you have finished, fasten off your yarn and weave in any loose ends to complete the pillow.
Feel free to use your hands to gently mold and shape your new pillow into your preferred form. And that’s it! Enjoy your charming moon pillow as a delightful addition to your home decor.
