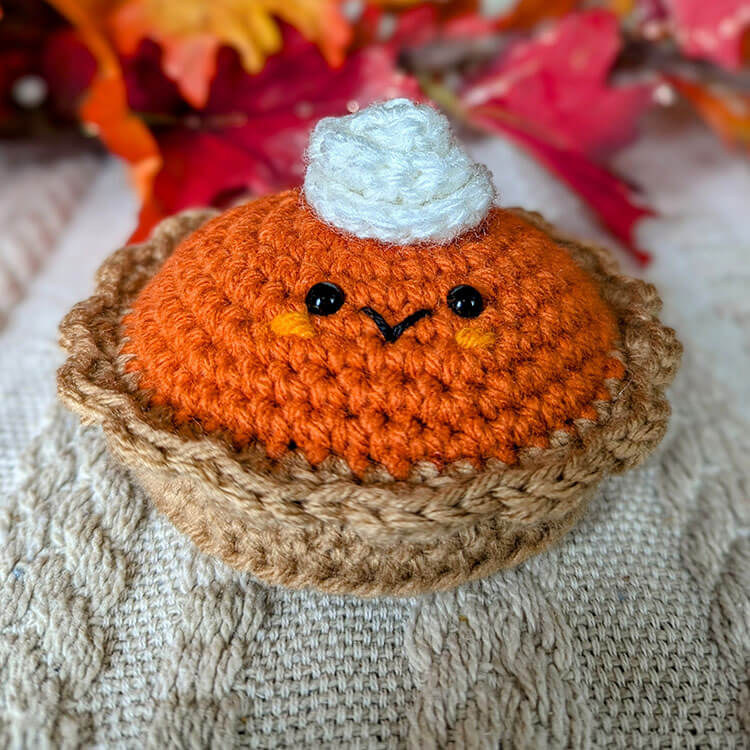
I am thrilled to share with you the free crochet pattern for my Pumpkin Pie Amigurumi! If you have been following my work for a while, you might already know that I absolutely adore creating pumpkin-themed items. There is something undeniably warm and comforting about these designs, which makes them special regardless of the season.

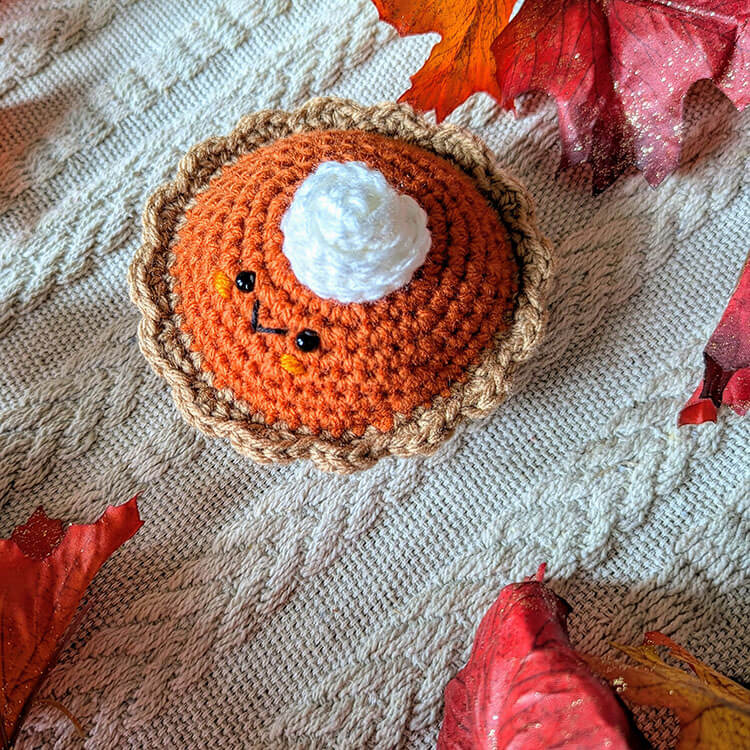
This pumpkin pie is incredibly easy to create, making it an ideal project for those who are just starting out with crochet.
Materials Needed:
- #4 medium weight yarn (I used Impeccable Solid Yarn by Loops and Threads) in the colors orange, tan, and white, along with black embroidery thread and an optional lighter orange yarn for the blush effect.
- A US size G 4.0 mm crochet hook.
- Poly-fill stuffing for plushiness.
- A small piece of cardboard for the bottom of the pie (approximately 6”x6”) – optional, but recommended for added stability.
- A stitch marker to keep track of your rounds.
- Scissors to cut yarn.
- A tapestry needle to weave in ends and finish off your project.
Approximate Size: The finished pie measures about 4 inches wide and 2.5 inches tall (excluding the whipped topping).
Important Pattern Notes:
- This pattern will be worked in continuous rounds. Unless specified otherwise, do not join at the end of each round.
Common Abbreviations (US):
ch – chain
st(s) – stitch(es)
sl st – slip stitch
sc – single crochet
sc blo – single crochet back loop only
inc – increase (working 2 stitches into the same stitch)
hdc – half double crochet
dc – double crochet
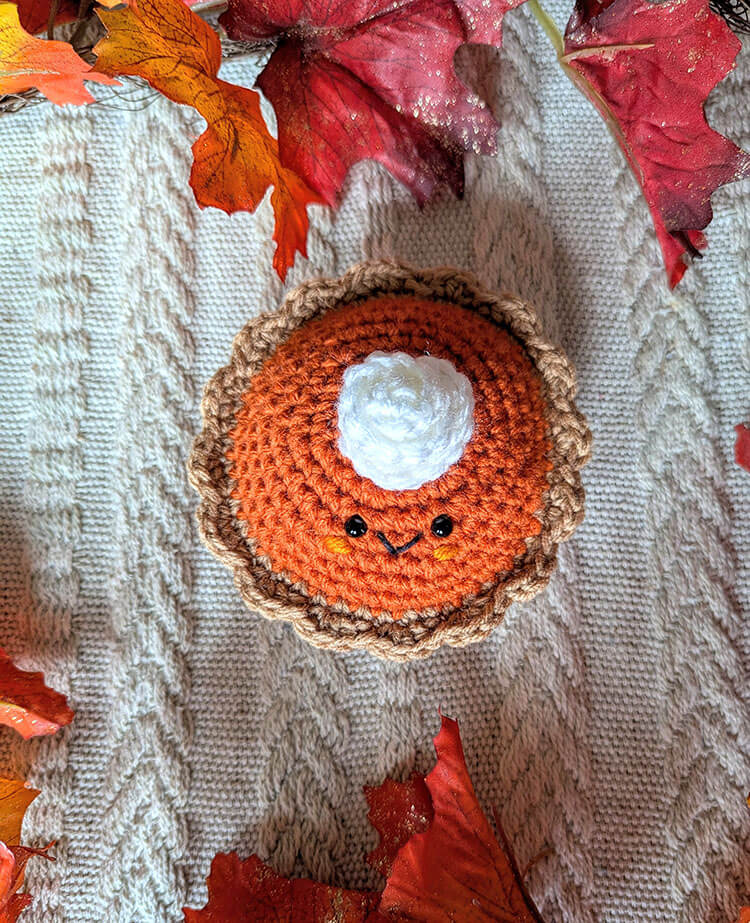
Pumpkin Pie Amigurumi Crochet Pattern
Making the Crust (using Tan yarn)
Begin with Ch 2.
Round 1: Work 6 sc into the 2nd chain from the hook. (Total of 6 sts)
Always use a stitch marker in the first stitch of each round; this will help you keep track of when a new round begins.
Round 2: Increase in each stitch around. (Total of 12 sts)
Round 3: *Increase, then single crochet in the next stitch.* Repeat this pattern around. (Total of 18 sts)
Round 4: *Increase, then single crochet in the next 2 stitches.* Repeat this pattern all the way around. (Total of 24 sts)
Round 5: *Increase, then single crochet in the next 3 stitches.* Keep repeating this pattern around. (Total of 30 sts)
Round 6: *Increase, then single crochet in the next 4 stitches.* Continue this repetition around. (Total of 36 sts)
Round 7: *Increase, then single crochet in the next 5 stitches.* Repeat around again. (Total of 42 sts)
Round 8: *Increase, then single crochet in the next 6 stitches.* Continue around. (Total of 48 sts)
Round 9: Work 1 single crochet back loop only in each stitch around. (Total of 48 sts)
Rounds 10-11: Work 1 single crochet into each stitch around. (Total of 48 sts)
Slip stitch to the first stitch, fasten off, and weave in any ends.
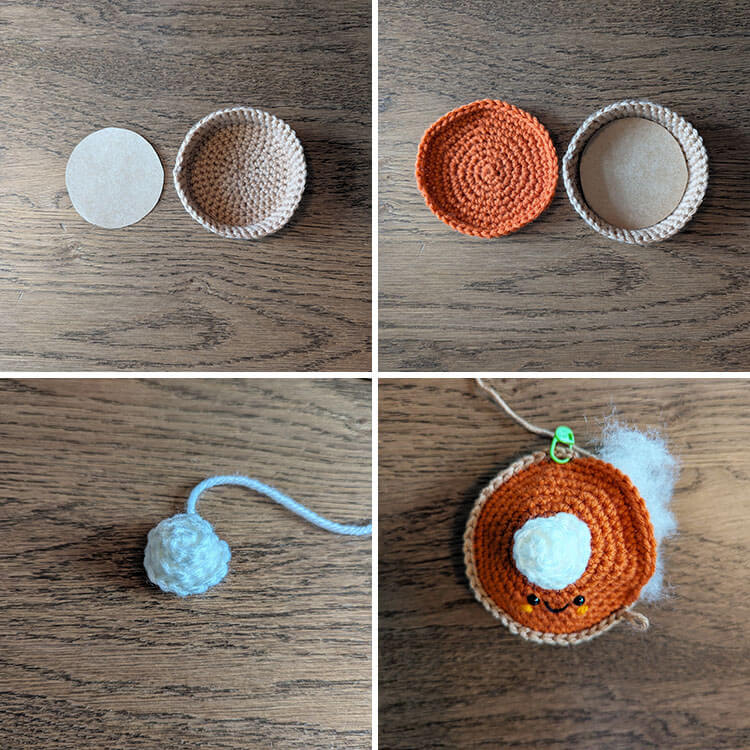
Cut Out the Cardboard (Optional)
This step is not mandatory. However, if you want to give your pie some much-needed support, place the crust on top of the cardboard and trace around it. Then, cut out the circle and place it inside the crust.
Creating the Pie Filling (using Orange yarn)
Begin with Ch 2.
Round 1: Work 6 sc into the 2nd chain from your hook. (Total of 6 sts)
As always, place your stitch marker in the first stitch of each round to mark the beginning of a new round.
Round 2: Increase in each stitch all the way around. (Total of 12 sts)
Round 3: *Increase, then single crochet in the next stitch.* Repeat this pattern around. (Total of 18 sts)
Round 4: *Increase, then single crochet in the next 2 stitches.* Keep repeating this pattern. (Total of 24 sts)
Round 5: *Increase, then single crochet in the next 3 stitches.* Continue repeating around. (Total of 30 sts)
Round 6: *Increase, then single crochet in the next 4 stitches.* Repeat all the way around. (Total of 36 sts)
Round 7: *Increase, then single crochet in the next 5 stitches.* Continue repeating this. (Total of 42 sts)
Round 8: *Increase, then single crochet in the next 6 stitches.* Keep this pattern around. (Total of 48 sts)
Round 9: Work 1 single crochet into each stitch around. (Total of 48 sts)
Slip stitch to the first stitch, fasten off, and weave in your ends.
Creating the Whipped Topping (using White yarn)
Begin with Ch 12.
In the 2nd chain from the hook, place 3 double crochet stitches, then continue with 1 double crochet in each remaining chain. Fasten off and leave a long tail for sewing the topping onto the pie.
Secure the whipped topping in the center of the pie filling.
Attaching the Eyes and Embroidering the Mouth and Blush
Position the eyes between rows 5 and 6, maintaining 3 stitches of space between them. You can then embroider a mouth and the blush if you desire.
Attaching the Crust and Filling, Stuffing, and Creating the Crust Edge
Lay the orange filling on top of the crust. Next, we are going to crochet the two pieces together using the Tan colored yarn.
Round 1: Attach your yarn to any stitch, chain 1, and single crochet in the same stitch. Work 1 single crochet in each stitch around to join the filling and crust. Before closing the pie, add your desired amount of stuffing. Once stuffed, proceed to finish crocheting around. (Total of 48 sts)
Slip stitch to the first stitch. Do not fasten off yet. Move on to round 2 to create the crust edge.
Round 2: Chain 1 and single crochet in the same stitch. For the next stitch, work 3 half double crochets, skip the following stitch, and slip stitch into the next stitch. Repeat this pattern around. When you have one stitch remaining, skip that stitch, and slip stitch to the chain 1. Fasten off and weave in your ends.