
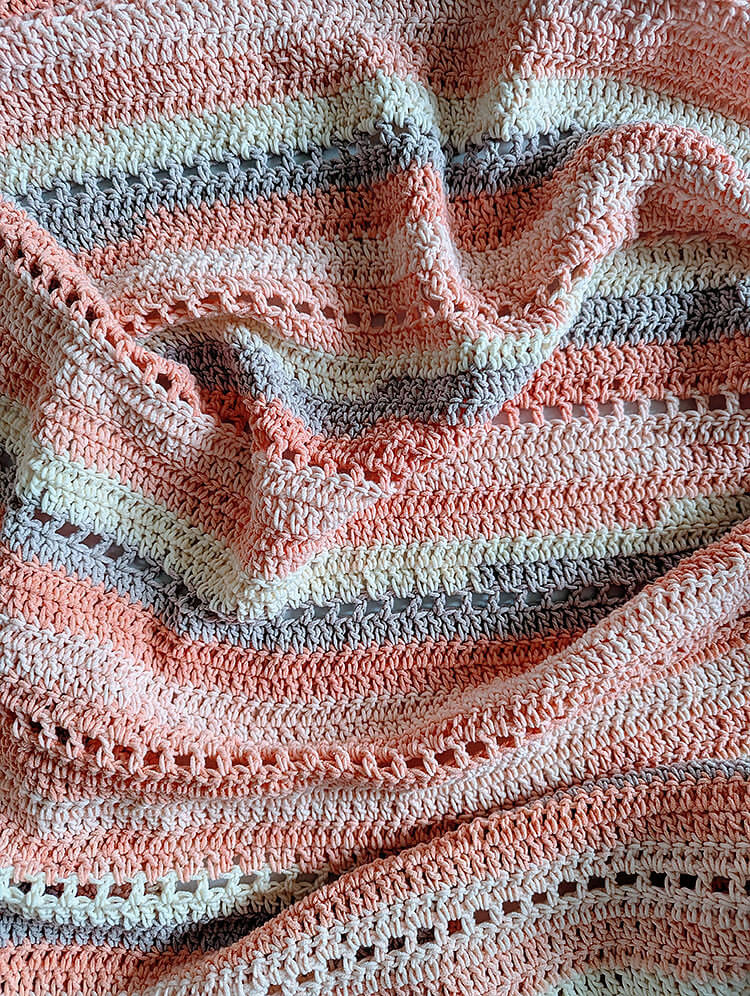
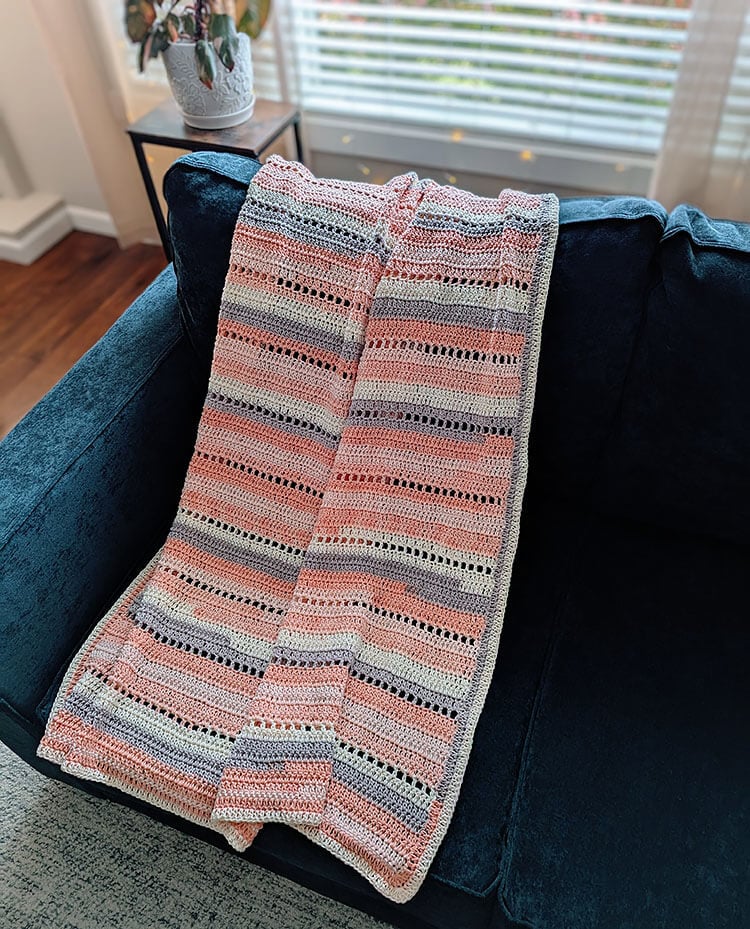
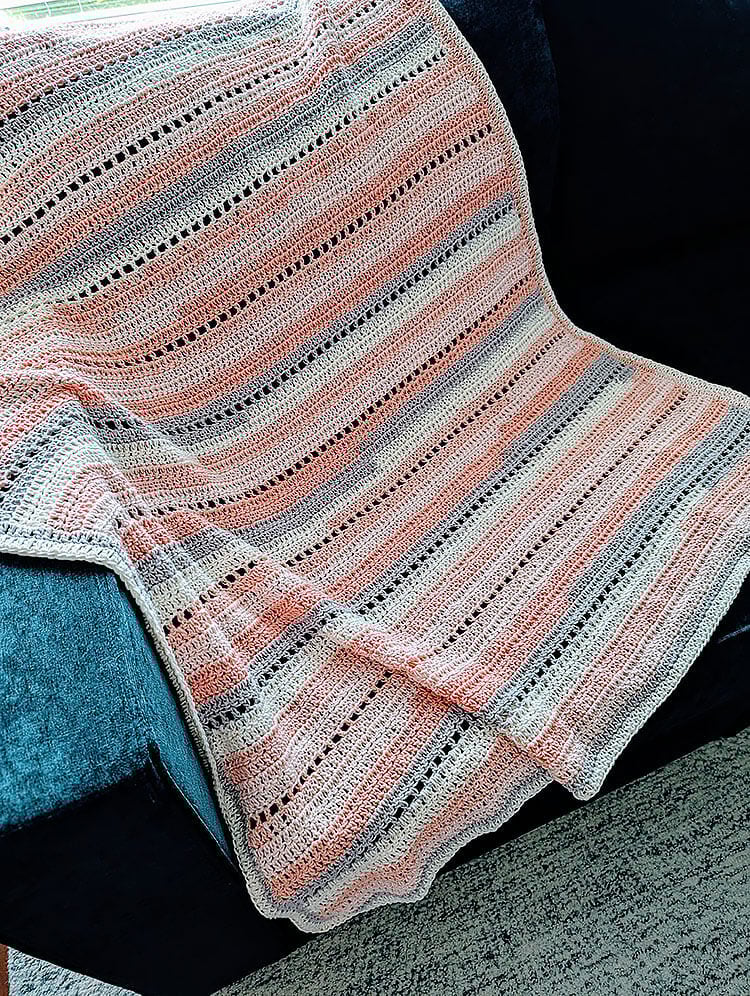
I am thrilled to share this delightful summer crochet blanket pattern with you! The Pink Sands Summer Blanket has swiftly become one of my go-to projects for warmer days. Crafted using Caron Cotton Cakes, this yarn is a wonderful cotton blend that is both soft and breathable, making it an ideal choice for summer crafting.

*This post may contain affiliate links.
Working on this blanket has been an absolute joy. The pattern contains enough variety to keep you engaged and entertained throughout the crocheting process, while still allowing for a casual experience so you can crochet while enjoying your favorite TV shows or listening to an audiobook. Additionally, the self-striping yarn adds an exciting twist that enhances the entire project!
Sizing Information for the Pink Sands Blanket
The Pink Sands blanket pattern is versatile and comes in two sizes: 39 inches by 50 inches, which is a larger lapghan size, and 48 inches by 60 inches, ideal for a throw. You have the flexibility to adjust the size to suit your needs; just make sure to start with an even number of chains and follow the pattern until your blanket reaches your desired dimensions.
I’ve also included a comprehensive blanket sizing guide below to assist you in selecting the perfect size for your project.
Blanket Sizing Guide
- Baby Blanket: 36 inches by 36 inches
- Toddler Blanket: 40 inches by 60 inches
- Lapghan: 36 inches by 48 inches
- Throw Blanket: 48 inches by 60 inches
- Twin Bed: 65 inches by 90 inches
- Double Bed: 84 inches by 90 inches
Materials Needed:
- Caron Cotton Cakes 530 yards of #4 worsted weight yarn in the color Frozen Yogurt. For the Larger Lapghan Size: 3 skeins and for the Throw Size: 5 skeins
- US size H 5.0 mm crochet hook
- Stitch markers (optional)
- Scissors
- Tapestry needle
Approximate Sizes: 39 inches by 50 inches (Larger Lapghan Size) and 48 inches by 60 inches (Throw Size)
Please follow the key based on the size of blanket you are crocheting: (Larger Lapghan or Throw)
Gauge (4 inches by 4 inches): Approximately 13 stitches and 8 rows
Size Adjustment: To customize the width of your blanket, begin with either a longer or shorter chain. Ensure that you start with an even number of chains for the best results.
Keep in mind the quantity of yarn needed if you decide to modify the size of your blanket.
Pattern Notes:
- The chain 2 does not count as a stitch.
- If you find it challenging to locate the first or last stitch of a row, using stitch markers can help you keep track.
Common Abbreviations Used (US):
ch – chain
st(s) – stitch(es)
sc – single crochet
dc – double crochet
sl st – slip stitch
Pink Sands Crochet Blanket Pattern
To get started, chain (128, 156)
Row 1: Begin by working 1 single crochet in the second chain from the hook. Continue placing 1 single crochet in each chain across the row. Chain 2 and turn. (127, 155 stitches)
Rows 2-7: Place 1 double crochet in the first stitch and in each subsequent stitch across the row. Chain 2 and turn.
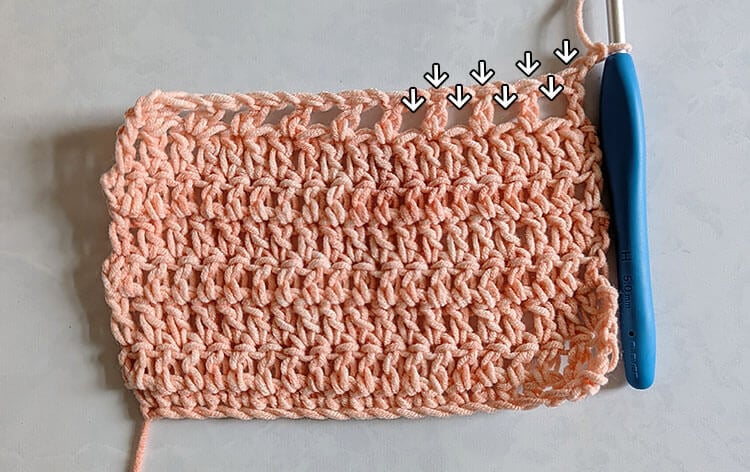
Row 8: In the first stitch, work 1 double crochet. Then, *chain 1, skip 1 stitch, and in the next stitch, work 1 double crochet.* Repeat from * to * across the row, ensuring to place 1 double crochet in the final stitch. Chain 2 and turn.
Note for Row 9: When the instructions indicate to “dc in next st,” this refers to the top of the double crochet from the previous row.
Row 9: Place 1 double crochet in the first stitch and 1 double crochet in the next chain space. Continue with *double crochet in next stitch, double crochet in next chain space.* Repeat from * to * across the row, finishing with 1 double crochet in the last stitch. Chain 2 and turn.
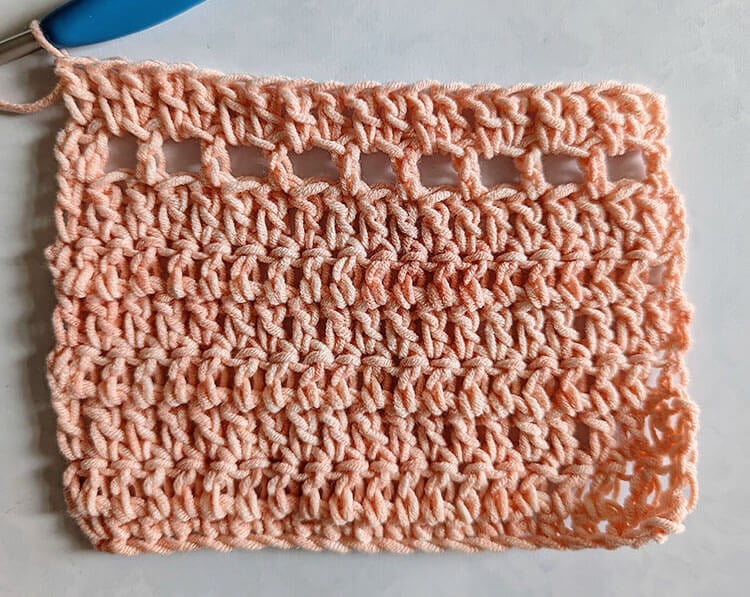
Rows 10-15: Work 1 double crochet in the first stitch and in each stitch across the row. Chain 2 and turn.
Repeat rows 8-15 until your blanket reaches either 50 inches or 60 inches, or your desired length. If you prefer not to add a border, you may fasten off and weave in your ends. However, if you would like to include a border, please hold off on fastening off for now as we will proceed to add a border.
Adding the Border
Round 1: With your yarn still attached, chain 2 and work double crochet stitches around the entire blanket. When you reach a corner, place 5 double crochet stitches into that corner. Continue this until you return to the starting corner, where you will also place 5 double crochet stitches.
Note: Crocheting along the sides can sometimes make it hard to see your stitches. Just do your best in this area; the exact stitch count is less critical.
Round 2: Continue working double crochet around the entire blanket again, placing 5 double crochet stitches at each corner. When you get back to the starting corner, place 5 double crochet stitches, slip stitch into the next 2 stitches, fasten off, and remember to weave in the ends.