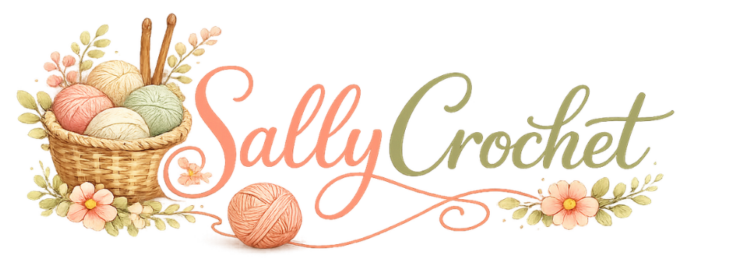
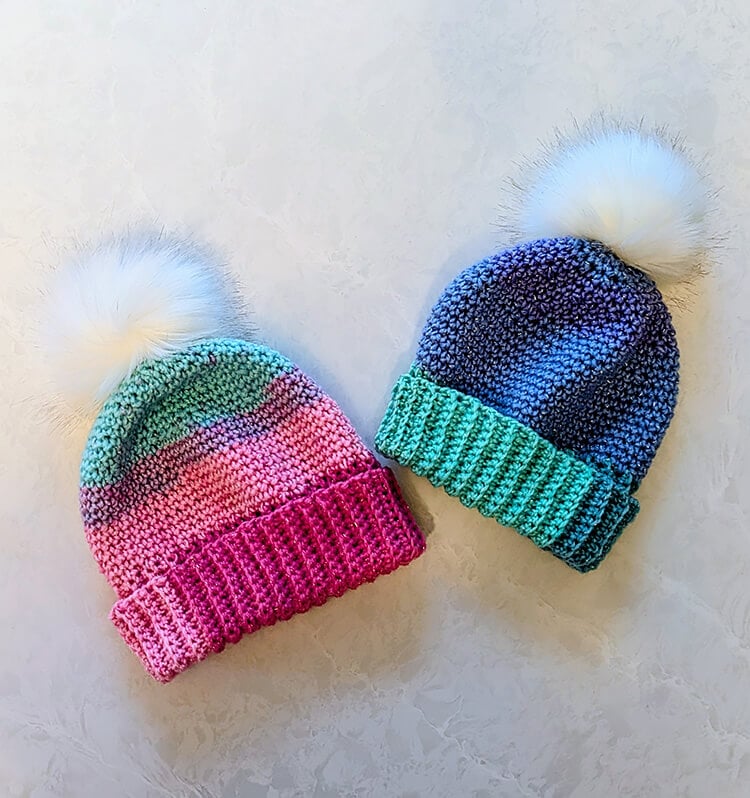
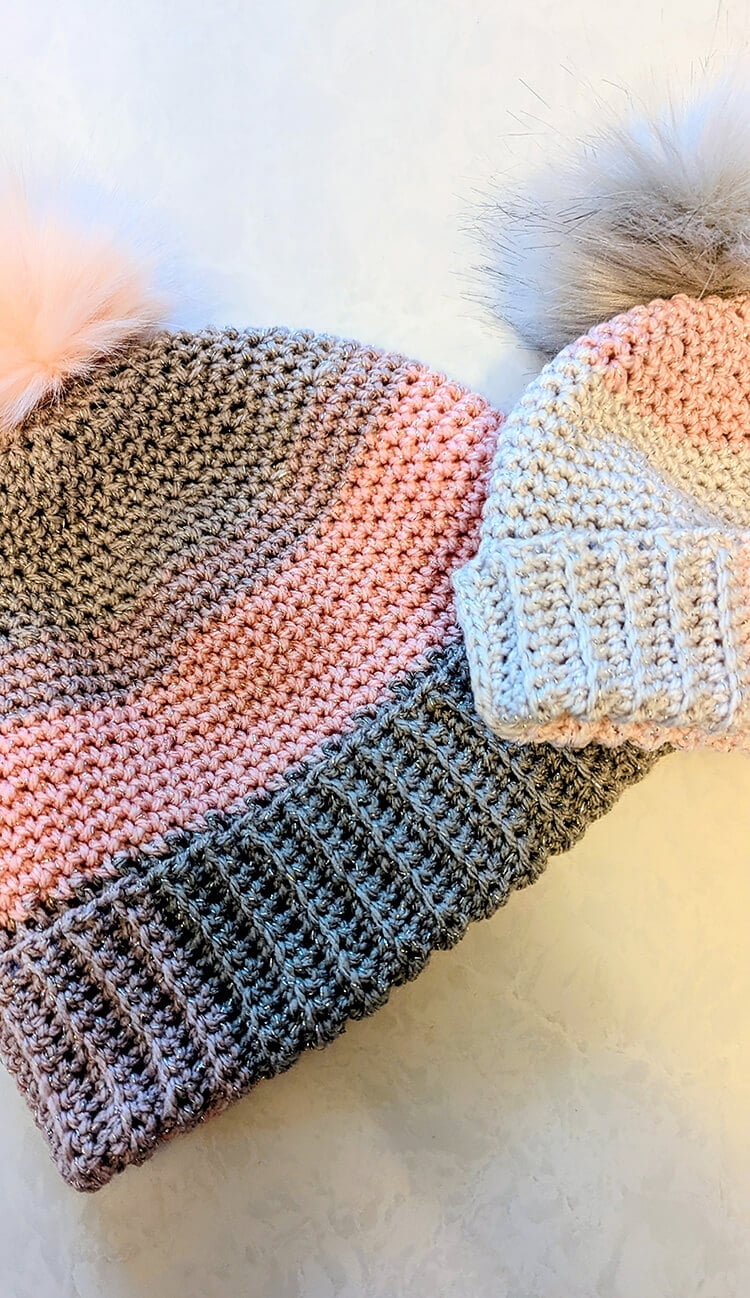
This simple and straightforward Starfall crochet beanie pattern is crafted with the beginner in mind. It is designed to be easy to follow, making it ideal for those who are just starting their crochet journey. By utilizing the single crochet stitch, you will be able to create a snug and comfortable beanie that not only works up rapidly but also boasts an appealing look. This project is perfect for those chilly days when you want to keep warm while showcasing your handmade creation.

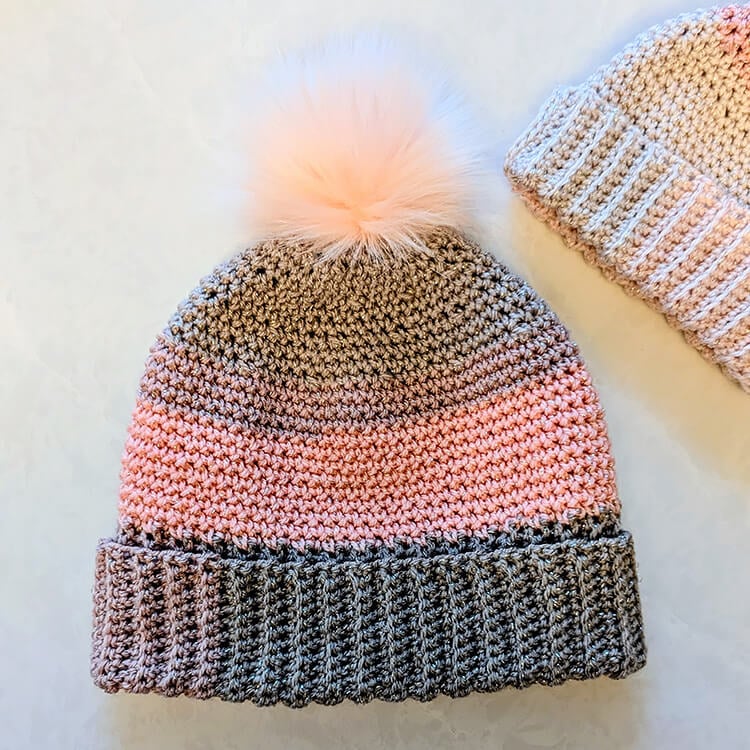
With the availability of four different sizes—baby, toddler, child, and adult—you can create a cozy beanie for each member of your family. These beanies are not only simple to crochet but also make wonderful gifts during the colder months. The versatility of the design means that everyone can enjoy their very own Starfall beanie.
Materials You Will Need:
- 1 ball of Lion Brand Mandala Sparkle Yarn, which contains 328 yards and is categorized as #3 DK weight. You will only need a single ball, no matter which size you decide to make.
- A US size H 5.0 mm crochet hook.
- A stitch marker to help keep track of your rounds.
- A pair of scissors to cut your yarn.
- A tapestry needle for weaving in ends.
- An optional pom pom to add a playful touch to your beanie.
Approximate Sizes:
- Baby: Height including brim is 5.5 inches and fits a head circumference of 13-15 inches.
- Toddler: Height including brim is 6.5 inches and fits a head circumference of 16-18 inches.
- Child: Height including brim is 7.5 inches and fits a head circumference of 19-20 inches.
- Adult: Height including brim is 8 inches and fits a head circumference of 21-22 inches.
As you follow the key throughout the pattern, remember to select the instructions based on the size of the beanie you are crafting—baby, toddler, child, or adult.
Gauge Information: The body of the hat typically features approximately 16 single crochet stitches and 17 rows for a 4-inch by 4-inch square. Meanwhile, the brim consists of approximately 9 single crochet stitches and 8 rows for a height of 2 inches.
Important Notes:
- The initial chain of 1 does not count as a stitch.
- You will be crocheting in continuous rounds, so do not join at the end of your rounds unless specified otherwise.
Common Abbreviations Used (US):
ch – chain
st(s) – stitch(es)
sc – single crochet
sc blo – single crochet back loop only
sl st – slip stitch
sc2tog – single crochet two together
Starfall Beanie Crochet Pattern
Double Brim Instructions
Row 1: Begin by chaining 19 (21, 23, 25) and make 1 single crochet in the second chain from the hook and continue with 1 single crochet in each chain across. After completing this row, chain 1 and turn your work. You should have 18 (20, 22, 24) stitches at this point.
Rows 2-54 (60, 66, 72): Work 1 single crochet in the back loop only across the row, starting with the first stitch. Make sure to chain 1 and turn your work at the end of each row.
Once finished with the rows, fold the piece so that the short ends meet. Using a slip stitch, join the last row to the first row, forming the brim of the beanie. Do not fasten off the yarn just yet, as you will be continuing to work on the body of the hat in the next steps using half double crochet stitches along the top of the brim.
Body of the Hat Instructions
Round 1: Chain 1 and then work 1 single crochet into each stitch around the brim. This should result in a total of 54 (60, 66, 72) stitches.
Be sure to place your stitch marker into the first stitch of this round, as it will assist you in keeping track of the beginning of each new round.
Rounds 2-7 (9, 11, 13): Continue to work 1 single crochet in each stitch around. You should maintain a total of 54 (60, 66, 72) stitches. If you prefer a taller beanie, feel free to add more rounds during this section.
Next, we will begin the decrease rounds.
Decrease Rounds Instructions
Round 1: In this round, you will work *1 single crochet in 4 stitches, followed by a single crochet two together over the next 2 stitches.* Repeat this pattern from the asterisk to the end of the round. This should yield 45 (50, 55, 60) stitches.
Round 2: Proceed to crochet 1 single crochet in each stitch all the way around. You should continue to have 45 (50, 55, 60) stitches.
Round 3: Work 1 single crochet in each stitch around again, keeping the total at 45 (50, 55, 60) stitches.
Round 4: This time, repeat the pattern: *1 single crochet in 3 stitches, followed by a single crochet two together over the next 2 stitches.* Finish this round with a total of 36 (40, 44, 48) stitches.
Round 5: Crochet 1 single crochet in each stitch around, maintaining 36 (40, 44, 48) stitches.
Round 6: Continue with 1 single crochet in each stitch around again, keeping the same stitch count of 36 (40, 44, 48).
Round 7: You will now work *1 single crochet in 2 stitches, then single crochet two together over the next 2 stitches.* Repeat this until you complete the round, resulting in 27 (30, 33, 36) stitches.
Round 8: Complete this round by working 1 single crochet in each stitch around, total should remain 27 (30, 33, 36) stitches.
Round 9: Once again, work 1 single crochet in each stitch around, keeping your total at 27 (30, 33, 36) stitches.
Round 10: In this round, you will do *1 single crochet in 1 stitch, followed by a single crochet two together over the next 2 stitches.* Repeat this until the end, which should leave you with 18 (20, 22, 24) stitches.
Round 11: Crochet 1 single crochet in each stitch around to complete this round with a total of 18 (20, 22, 24) stitches.
Round 12: To finish the decrease rounds, crochet two single crochets together all the way around. This will leave you with 9 (10, 11, 12) stitches remaining.
Closing the Top of the Beanie
To finish off, fasten off the yarn giving yourself a long tail, about 12 inches, for the sewing process. Once you complete the last round, you will notice a small opening at the top of your beanie. To close this opening, thread the yarn tail onto a tapestry needle and pass it through each of the stitches around the opening. When you return to the starting point, gently pull the yarn to close the opening tightly. If needed, you can continue to weave the yarn through the stitches to ensure that the top of the beanie is secured well. Finally, fasten off and weave in your ends to complete your project.
This beanie has been designed to minimize any bunching at the top, which allows you to either sport it as is or enhance it with a pom pom for an added flair. I personally purchase my pom poms with an elastic loop, making it quick and easy to attach them when desired.
I truly hope you enjoy wearing your finished beanie or delight in giving them as gifts to loved ones!