
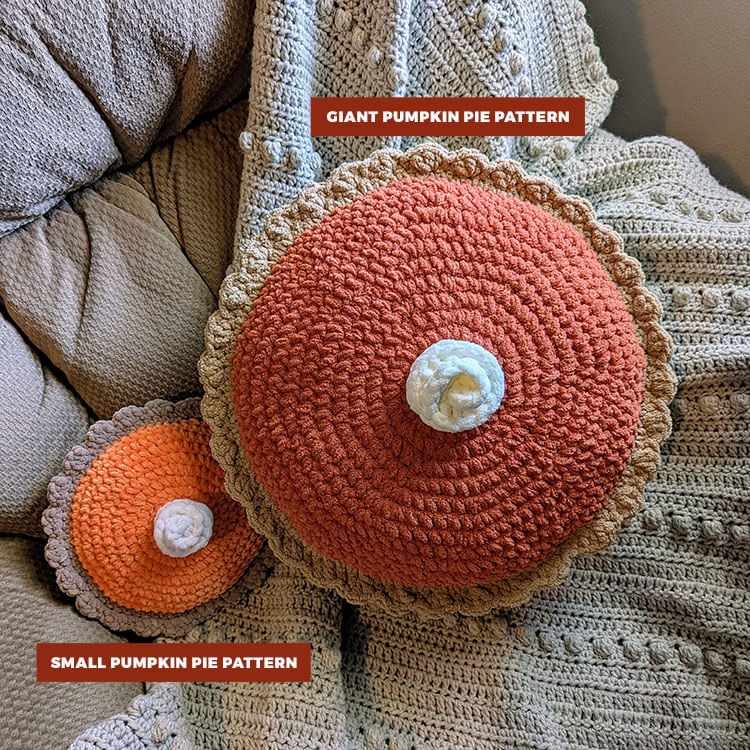
I am truly thrilled to share with you a delightful pattern for creating a Giant Pumpkin Pie Pillow! After completing my small pumpkin pie, I recognized that I wanted to venture into making something larger and more eye-catching. Now, I am overjoyed to announce that I have successfully achieved this goal with this exquisite pillow design.

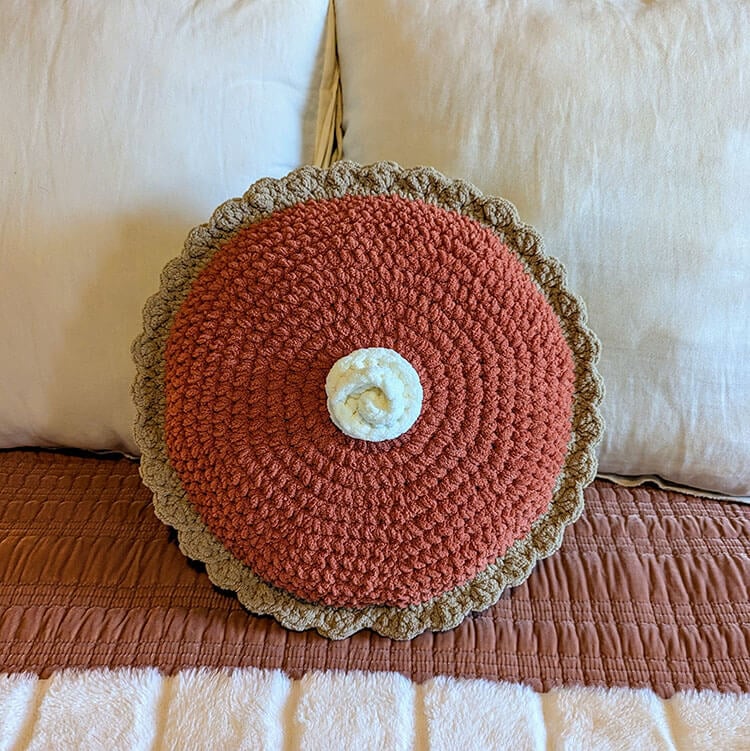
This pattern is incredibly beginner-friendly and will serve as a charming addition to your autumn decor. You can place this delightful pillow on your bed or sofa to create a warm and inviting fall atmosphere, enhancing the coziness of your home.
If you would like to print the pattern, you can purchase the ad-free printable PDF from my shop.
Materials Required:
- 1 skein of Bernat Blanket #6 Super Bulky weight yarn in the color Sand.
- 1 skein of Bernat Blanket #6 Super Bulky weight yarn in the color Orange Leaf.
- A small amount of Bernat Blanket #6 Super Bulky weight yarn in the color Vintage.
- One US size L 8.0 mm crochet hook.
- Poly-fil for stuffing your pillow.
- Stitch marker for tracking your stitches.
- Scissors for cutting yarn and finishing off.
- A tapestry needle for weaving in ends.
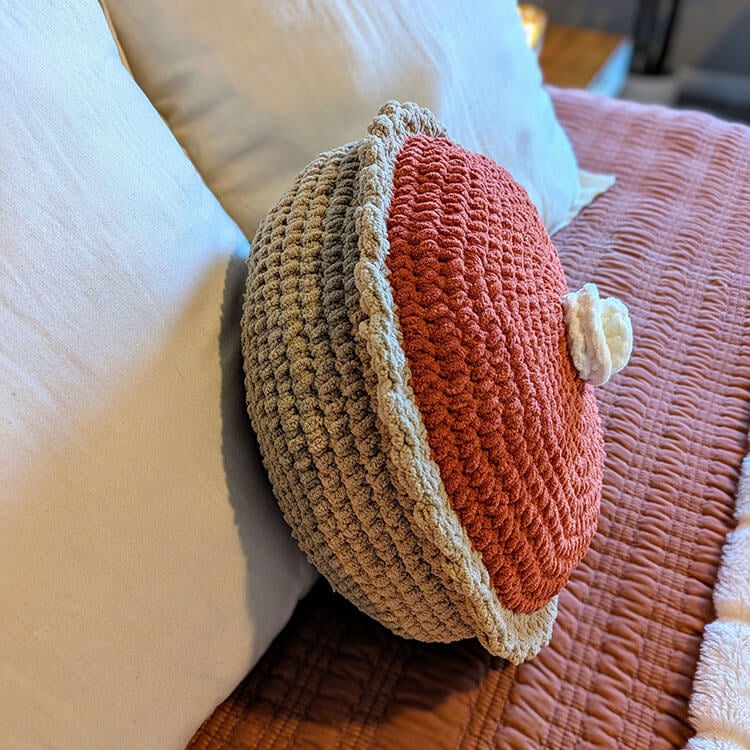
Approximate Size: This pillow measures about 17 inches wide and 7 inches tall, excluding the whipped topping.
Pattern Notes:
- The project will be crafted in continuous rounds. Unless specified, do not join at the end of each round, allowing for a smooth finish.
- The chain stitch (ch 1) does not count as a stitch in this pattern.
Common Abbreviations (US):
ch – chain
st(s) – stitch(es)
sl st – slip stitch
sc – single crochet
sc blo – single crochet in the back loop only
inc – increase; you will work two stitches into the same stitch
hdc – half double crochet
dc – double crochet
Giant Pumpkin Pie Pillow Crochet Pattern
Creating the Pie Filling (using Orange Leaf yarn)
To begin, chain 2.
Round 1: Work 8 single crochets into the 2nd chain from your hook. This round equals 8 stitches.
As you work through each round, remember to place your stitch marker in the first stitch. This will be essential in helping you keep track of when you are starting each new round.
Round 2: Increase in every stitch around. You will end up with 16 stitches.
Round 3: *Increase, then single crochet in the next stitch*. Repeat this pattern around until you have 24 stitches.
Round 4: *Increase, then single crochet in the next 2 stitches.* Continue this around for a total of 32 stitches.
Round 5: *Increase, then single crochet in the next 3 stitches*. Repeat until you have 40 stitches.
Round 6: *Increase, then single crochet in the next 4 stitches*. Your total should now be 48 stitches.
Round 7: *Increase, then single crochet in the next 5 stitches*. This will bring your total to 56 stitches.
Round 8: *Increase, then single crochet in the next 6 stitches*. You should have 64 stitches now.
Round 9: *Increase, then single crochet in the next 7 stitches*. Repeat this around for a total of 72 stitches.
Round 10: *Increase, then single crochet in the next 8 stitches*. Now you should have 80 stitches.
Round 11: *Increase, then single crochet in the next 9 stitches*. Your total will be 88 stitches at this point.
Round 12: *Increase, then single crochet in the next 10 stitches*. You will have 96 stitches now.
Round 13: *Increase, then single crochet in the next 11 stitches*. This brings your total to 104 stitches.
Round 14: Place one single crochet in each stitch around. You will still maintain 104 stitches.
Join with a slip stitch to the first stitch, fasten off, and weave in the ends to finish this part.
Creating the Crust (using Sand yarn)
To begin, chain 2.
Round 1: Work 8 single crochets into the 2nd chain from the hook, resulting in 8 stitches.
Don’t forget to place your stitch marker to help track your rounds.
Round 2: Increase in every stitch, obtaining a total of 16 stitches.
Round 3: *Increase, then single crochet in the next stitch*. You will now have 24 stitches.
Round 4: *Increase, then single crochet in the next 2 stitches*. Continue this until you reach 32 stitches.
Round 5: *Increase, then single crochet in the next 3 stitches*, reaching a total of 40 stitches.
Round 6: *Increase, then single crochet in the next 4 stitches*, for a total of 48 stitches.
Round 7: *Increase, then single crochet in the next 5 stitches*, getting to 56 stitches.
Round 8: *Increase, then single crochet in the next 6 stitches*, totaling 64 stitches.
Round 9: *Increase, then single crochet in the next 7 stitches*, leading you to 72 stitches.
Round 10: *Increase, then single crochet in the next 8 stitches*, resulting in 80 stitches.
Round 11: *Increase, then single crochet in the next 9 stitches*, now reaching 88 stitches.
Round 12: *Increase, then single crochet in the next 10 stitches*, resulting in 96 stitches.
Round 13: *Increase, then single crochet in the next 11 stitches*, totaling 104 stitches.
Round 14: Single crochet in the back loop only for each stitch, maintaining 104 stitches.
Rounds 15-20: Continue placing one single crochet in each stitch around, keeping the total at 104 stitches.
Join with a slip stitch to the first stitch, then fasten off and weave in your ends.
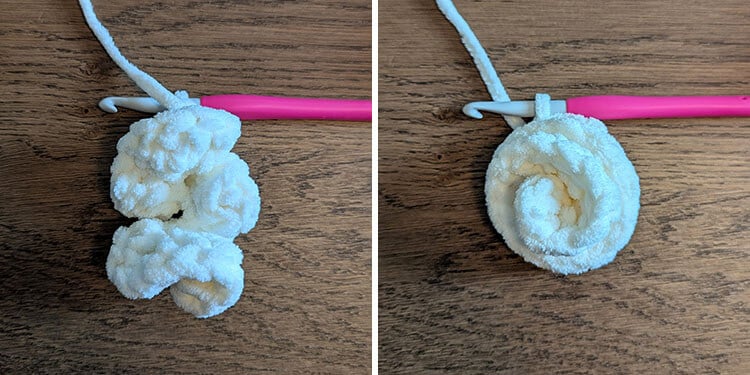
Creating the Whipped Topping (using Vintage yarn)
To begin, chain 14.
Place 3 double crochets in the 2nd chain from the hook and continue with double crocheting in each chain across. Once complete, fasten off while leaving a long tail for sewing purposes.
To create a whimsical whipped cream effect, wrap the yarn in a spiral shape. You may need to adjust it until you achieve the desired look. Once satisfied, securely attach the whipped topping to the pie filling.
Joining the Crust and Filling, Stuffing, and Finishing the Crust Edge
Begin by positioning the orange filling atop the crust. You will use single crochet stitches in the Sand yarn to join these two pieces together.
Round 1: Attach the yarn to any stitch in the crust. Chain 1 and work a single crochet into the same stitch. Then, continue to single crochet in every stitch around to connect the filling and crust. Before fully closing the pie, add your desired amount of stuffing. After you are satisfied with the stuffing, continue to close the piece with single crochet stitches around, maintaining a total of 104 stitches.
Join with a slip stitch to the first stitch. Do not fasten off, as we now move on to creating the crust edge.
Round 2: Chain 1 and single crochet in the same stitch, followed by working 3 half double crochets in the next stitch, skipping the next stitch and finishing with a slip stitch in the following stitch. Repeat this sequence around. When you reach the final stitch, skip it and join with a slip stitch to the initial chain. Fasten off your work and weave in all ends to create a neat finish.
