This crochet beanie pattern provides a snug yet flexible fit, making it a perfect accessory for various activities. It comes in four different sizes—baby, toddler, child, and adult—ensuring that you can create a stylish piece for everyone in the family. Whether you’re going out for a leisurely stroll, tackling your daily errands, or crafting a heartfelt gift, this adaptable beanie is destined to become a beloved staple in your wardrobe.

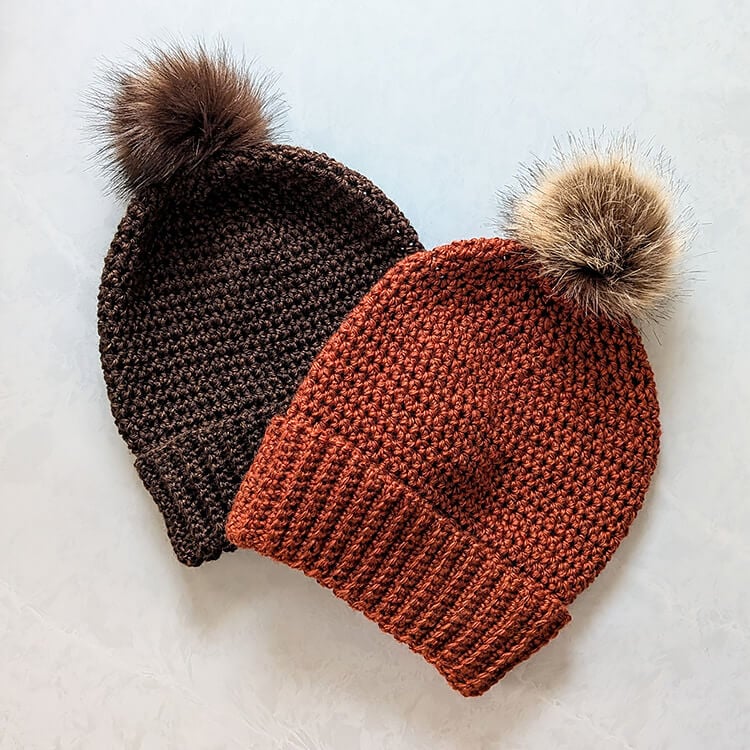
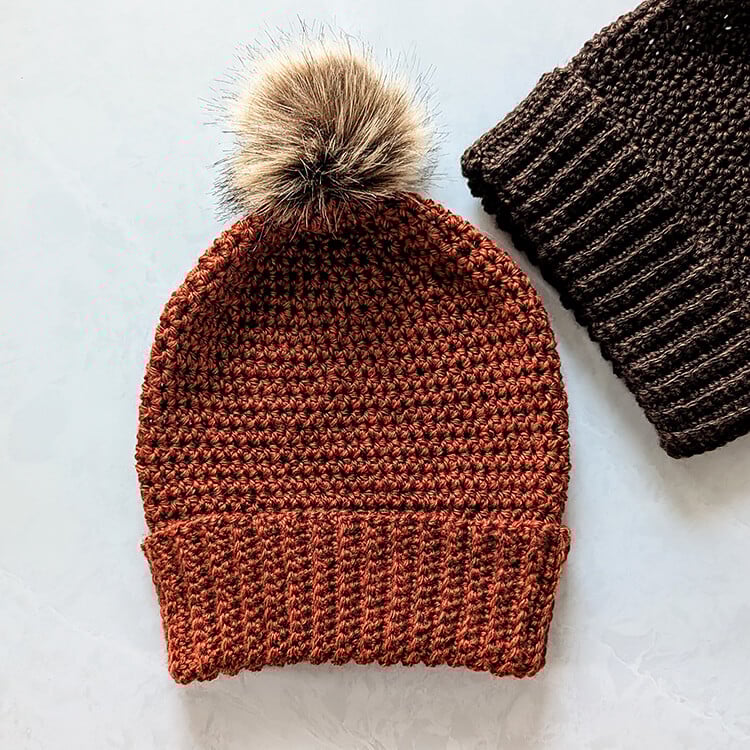
The Cascade Mountains are an iconic feature of life in the Pacific Northwest. Inspired by the earthy tones of brown and burnt orange, I designed this beanie to reflect the stunning landscapes that define the region, especially during the beautiful autumn months. Thus, it was only fitting to name this stylish accessory the Cascades Beanie.
The stitch pattern used here is uncomplicated, making it a wonderful option for beginners. This beanie was made to be a dependable go-to piece that you can effortlessly throw on over your favorite flannel, jacket, or cozy sweater. If you appreciate quick projects that are not just practical but also visually appealing, this pattern will suit you perfectly.
Materials Needed:
Sizes (approximate):
- Baby: Height including brim is 7 inches and fits a head circumference of 13-15 inches.
- Toddler: Height including brim is 8 inches and accommodates a head circumference of 16-18 inches.
- Child: Height including brim is 9 inches and fits a head circumference of 19-20 inches.
- Adult: Height including brim is 10 inches and suitable for a head circumference of 21-22 inches.
Make sure to follow the size key throughout the pattern, focusing on the size beanie you are crocheting: baby (toddler, child, adult).
Gauge: For the body of the hat, you will find approximately 14 half double crochet stitches and 11 rows make up a 4-inch by 4-inch square. The brim of the hat features about 8 single crochet stitches and 8 rows for a 2-inch portion.

Pattern Notes:
- The initial chain does not count as a stitch.
- We will be working in continuous rounds. Unless specified, do not join at the end of each round.
Abbreviations (US):
ch – chain
st(s) – stitch(es)
sc – single crochet
sc blo – single crochet back loop only
sl st – slip stitch
hdc – half double crochet
hdc2tog – half double crochet two together
Cascades Beanie Crochet Pattern
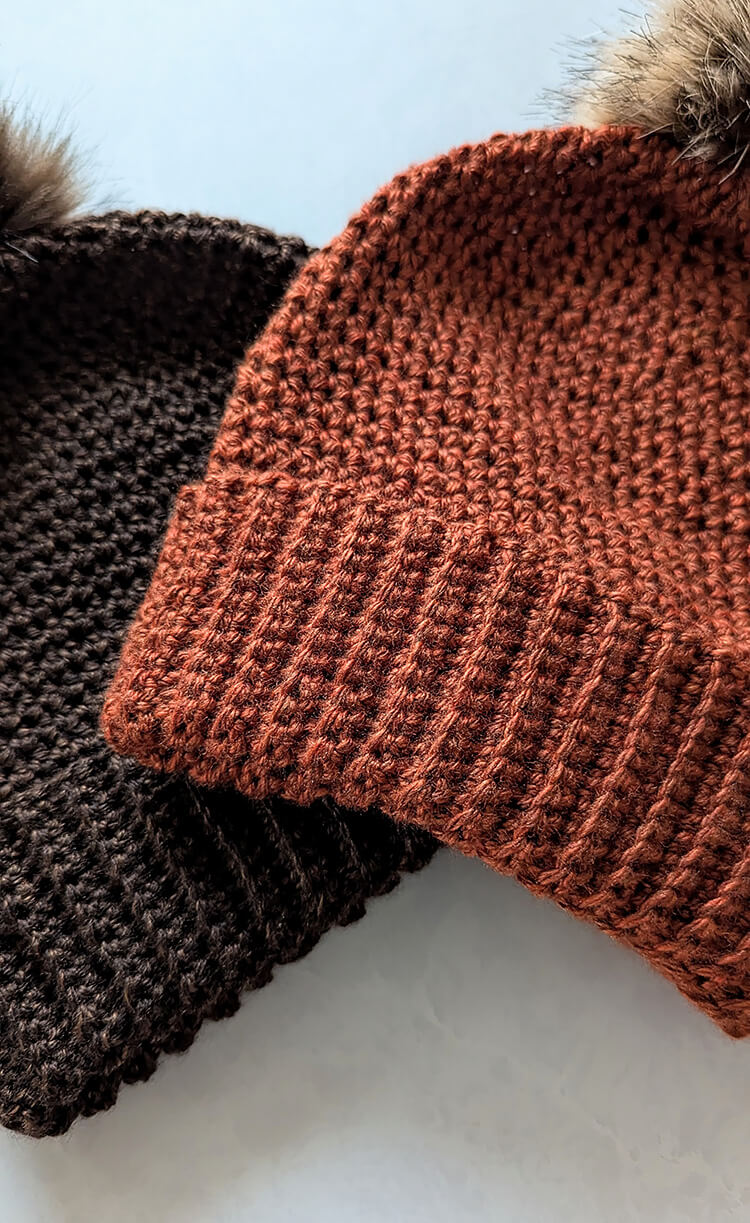
Double Brim
Row 1: Begin by chaining 19 (21, 23, 25) and then work 1 single crochet in the 2nd chain from the hook and in each subsequent chain across. To finish this row, chain 1 and turn. You will have a total of 18 (20, 22, 24) stitches now.
Rows 2-48 (54, 60, 66): Work 1 single crochet in the back loop only for the first stitch and in each stitch across. After completing this row, chain 1 and turn.
Next, fold the piece so that the short ends align and join them with a slip stitch, connecting the last row to the first. You will now have formed the brim of your beanie. Do not fasten off, as we will begin working half double crochet stitches along the top of the brim shortly.
Body of Hat
Round 1: Chain 1 and work 1 half double crochet into each stitch around the brim, resulting in a total of 48 (54, 60, 66) stitches.
Be sure to place a stitch marker into the first stitch of each round. This will help you track the start of a new round and maintain your counting accurately.
Rounds 2-6 (8, 10, 12): Work 1 half double crochet in each stitch around, retaining a total of 48 (54, 60, 66) stitches. For those who prefer a shorter beanie, feel free to reduce the number of rounds in this section.
Now let us transition into the decrease rounds.
Decrease Rounds
Round 1: Work *1 half double crochet in 4 stitches, then perform a half double crochet two together over the next 2 stitches.* Repeat this sequence around. You should have a total of 40 (45, 50, 55) stitches remaining.
Round 2: Simply work 1 half double crochet in each stitch around, keeping your count at 40 (45, 50, 55) stitches.
Round 3: Execute the following pattern: *1 half double crochet in 3 stitches, then half double crochet two together over the next 2 stitches.* Repeat this around, resulting in 32 (36, 40, 44) remaining stitches.
Round 4: Continue by placing 1 half double crochet in each stitch around, so you maintain 32 (36, 40, 44) stitches.
Round 5: For this round, work *1 half double crochet in 2 stitches, followed by a half double crochet two together over the next 2 stitches.* Repeat this around, leading to 24 (27, 30, 33) stitches remaining.
Round 6: Keep working by placing 1 half double crochet in each stitch around, retaining the count at 24 (27, 30, 33) stitches.
Round 7: For this round, follow the pattern: *1 half double crochet in the first stitch, then perform a half double crochet two together over the next 2 stitches.* Repeat this until the end, resulting in 16 (18, 20, 22) stitches.
Round 8: In this final decrease round, work half double crochet two together around, which will give you 8 (9, 10, 11) stitches left.
Closing the Top
At this point, fasten off the yarn, leaving a long tail of about 12 inches so that you can sew it closed appropriately. After you complete the final round, there will be a noticeable hole at the top of your beanie. To seamlessly close this hole, thread the yarn tail onto a tapestry needle and stitch through each of the stitches around the opening.
Once you reach your starting point, gently pull the yarn to close the hole. If necessary, feel free to weave the yarn through a few additional times to securely anchor the top of the beanie. Finally, fasten off and conceal any loose ends for a polished finish.
This beanie was designed with minimal gathering at the top, allowing you the flexibility to wear it with or without a pom pom. I typically purchase my pom poms with an elastic loop, making it both quick and easy to attach them when you wish.
I truly hope you enjoy wearing your beanie through the colder months, bringing warmth and style to your winter wardrobe!