
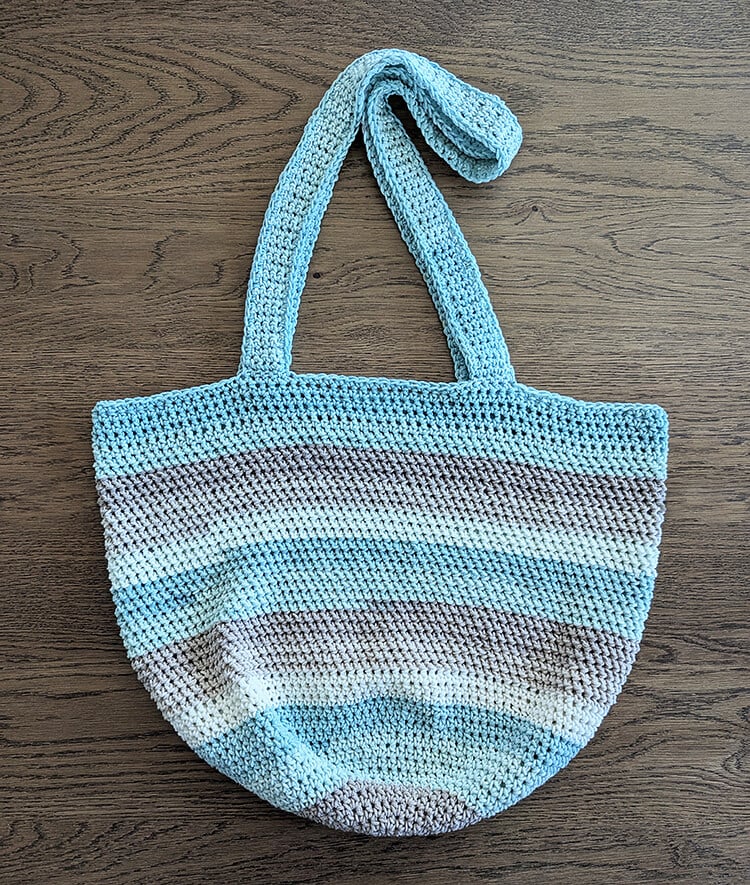
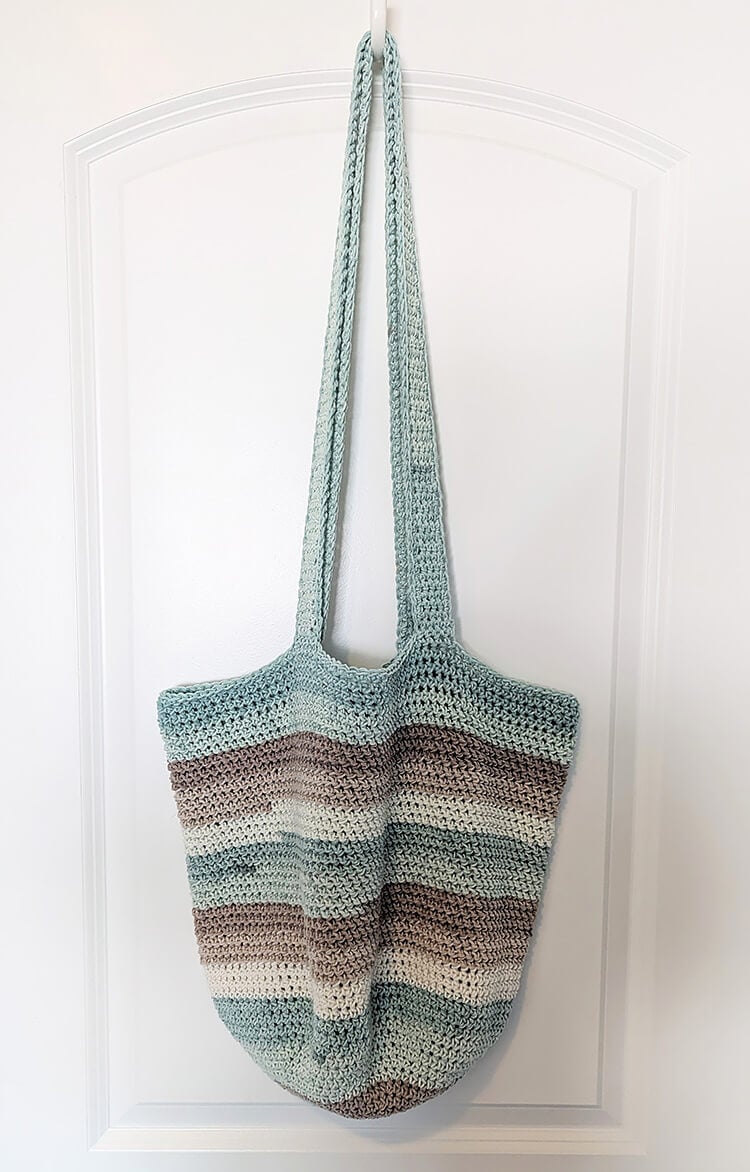
I am thrilled to present my Seaside Tote crochet pattern! This tote is an ideal companion for all your summer escapades. Whether you are planning a relaxing trip to the beach, wandering through a bustling local farmer’s market, or enjoying a lively summer festival, I believe this tote will quickly become one of your favorite accessories.

Yarn Recommendations for the Seaside Tote
For optimal results, I highly encourage you to usecotton yarn for this delightful project. Cotton yarn is an exceptional choice for making totes because of its strength and durability, making it ideal for regular use. This type of yarn is also easy to wash, which is especially advantageous when your tote is filled with sandy beach items or fresh produce from a market visit.
Moreover, a tote crafted from cotton yarn will have less stretch compared to one made from acrylic yarn, meaning that your tote will more effectively maintain its shape over time. However, keep in mind that, regardless of the yarn type used, crochet totes will stretch, especially as they bear heavier items. To ensure your tote retains its original form, I recommend lining it with fabric. Adding a inner lining can significantly enhance the longevity of your tote.
Materials Needed:
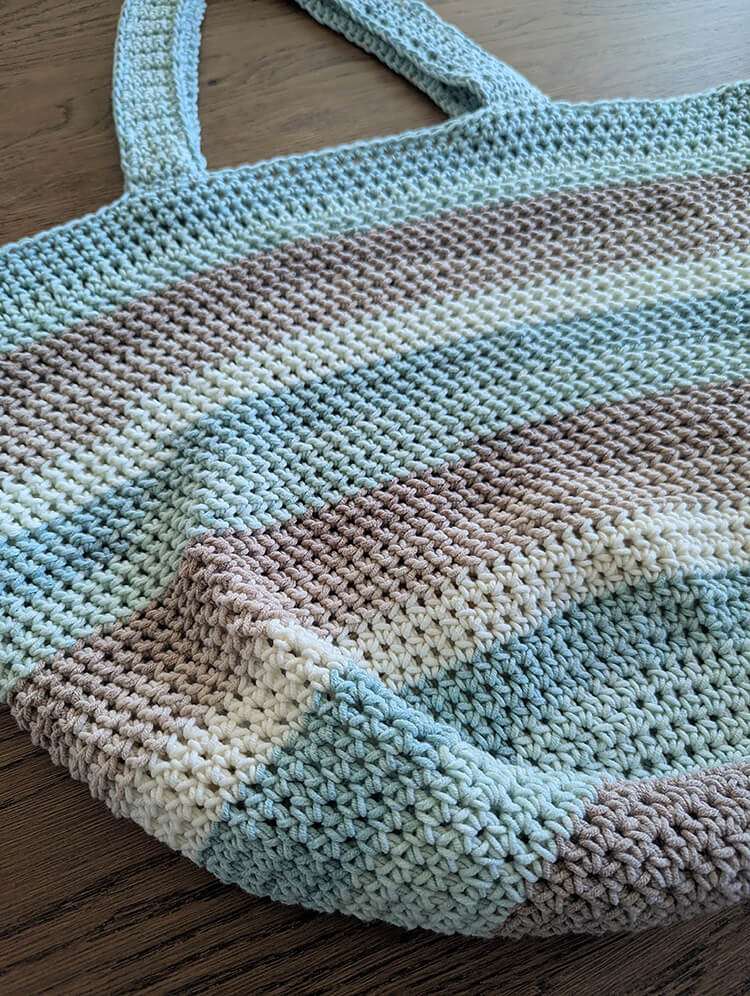
- 1 Caron Cotton Cakes in the color Beach Glass (530 yds). This yarn is composed of 60% cotton and 40% acrylic. If you prefer to have control over the colors when using self-striping yarn, it might be wise to purchase an additional ball. For less stretch, you could opt for a 100% worsted weight cotton yarn like Lily Sugar ‘N Cream, with around 5 balls required for this tote.
- US size H 5.0 mm crochet hook
- Stitch markers
- Scissors
- Tapestry needle
Approximate Size: 15” tall (excluding the strap) and 18” wide
Important Pattern Notes:
- We will be working in continuous rounds, so do not join at the end of your rounds.
- Remember, the chains used for the straps do not count as stitches.
Abbreviations Used (US):
ch – chain
st(s) – stitch(es)
hdc – half double crochet
hhdc – herringbone half double crochet: Yarn over, insert your hook into the designated stitch, yarn over and pull through both the stitch and the first loop on the hook (you will have two loops on the hook). Yarn over again and pull through both loops.
sc – single crochet
inc – increase (work 2 stitches into the same stitch)
sl st – slip stitch
If you’re interested in printing the pattern, visit my shop to purchase the ad-free printable PDF.
The Seaside Tote Crochet Pattern
Note: The first 15 rounds will establish the base of the tote and dictate its width. If you wish to create a narrower tote, you can complete fewer rounds for this section.
To start, ch 2.
Round 1: Create 8 hdc into the second chain from the hook. (You will have 8 stitches). Remember to place a stitch marker in the first stitch of each round. This helps keep track of when you start a new round.
Round 2: Make an increase in every stitch around. (You will have 16 stitches).
Round 3: Repeat: *Inc, hdc in the next stitch.* Continue this pattern around. (You will have 24 stitches).
Round 4: Repeat: *Inc, hdc in the next 2 stitches.* Continue this pattern around. (You will have 32 stitches).
Round 5: Repeat: *Inc, hdc in the next 3 stitches.* Continue this around. (You will have 40 stitches).
Round 6: Repeat: *Inc, hdc in the next 4 stitches.* Continue around. (You will have 48 stitches).
Round 7: Repeat: *Inc, hdc in the next 5 stitches.* Continue around. (You will have 56 stitches).
Round 8: Repeat: *Inc, hdc in the next 6 stitches.* Continue around. (You will have 64 stitches).
Round 9: Repeat: *Inc, hdc in the next 7 stitches.* Continue around. (You will have 72 stitches).
Round 10: Repeat: *Inc, hdc in the next 8 stitches.* Continue around. (You will have 80 stitches).
Round 11: Repeat: *Inc, hdc in the next 9 stitches.* Continue around. (You will have 88 stitches).
Round 12: Repeat: *Inc, hdc in the next 10 stitches.* Continue around. (You will have 96 stitches).
Round 13: Repeat: *Inc, hdc in the next 11 stitches.* Continue around. (You will have 104 stitches).
Round 14: Repeat: *Inc, hdc in the next 12 stitches.* Continue around. (You will have 112 stitches).
Round 15: Repeat: *Inc, hdc in the next 13 stitches.* Continue around. (You will have 120 stitches).
Note: We will now begin to work on the body of the tote. If you prefer a shorter tote, you can complete fewer rounds during rounds 20 through 43.
Rounds 16-19: Place 1 hdc in each stitch around.
Rounds 20-43: Place 1 hhdc in each stitch around.
Rounds 44-46: Continue to place 1 hdc in each stitch around.
Round 47: Make a single crochet in each stitch around. Fasten off and weave in any loose ends.
Creating the Straps
*Prepare 2 straps.*
Row 1: Ch 5, establish 1 sc in the second ch from the hook and continue with 1 sc in each chain across. Ch 1 and turn. (You will have 4 stitches).
Row 2: Establish 1 sc in each stitch, ch 1 and turn. (You will have 4 stitches).
Continue repeating row 2 until your strap measures approximately 29 inches or 128 rows. Feel free to adjust the length of your strap to your preference.
If you choose not to add a border to your straps, you can fasten off and weave in your ends. However, should you wish to add a border, keep your yarn attached and follow the instructions below.
Adding a Border to the Straps
*Repeat for both straps.*
Round 1: With your yarn still attached, ch 1 and sc around the strap. In the corners, include 2 stitches in each corner. At the original corner, place another 2 stitches, sl st to the next stitch, then fasten off and weave in your ends.
Note: Finding the stitches can be tricky when working along the sides. Just do your best; the stitch count is not critical.
Attaching the Straps to the Tote
Position your tote flat on a surface. Take one of your straps and place the two ends on top of the tote, ensuring that each end is approximately 5 inches away from the tote’s sides. You can utilize a stitch marker to temporarily secure the strap’s position.

Next, you can either sew the strap to the tote using a whip stitch or your preferred sewing method, or you can use your hook and yarn to sc them together. Once completed, fasten off and weave in your ends.
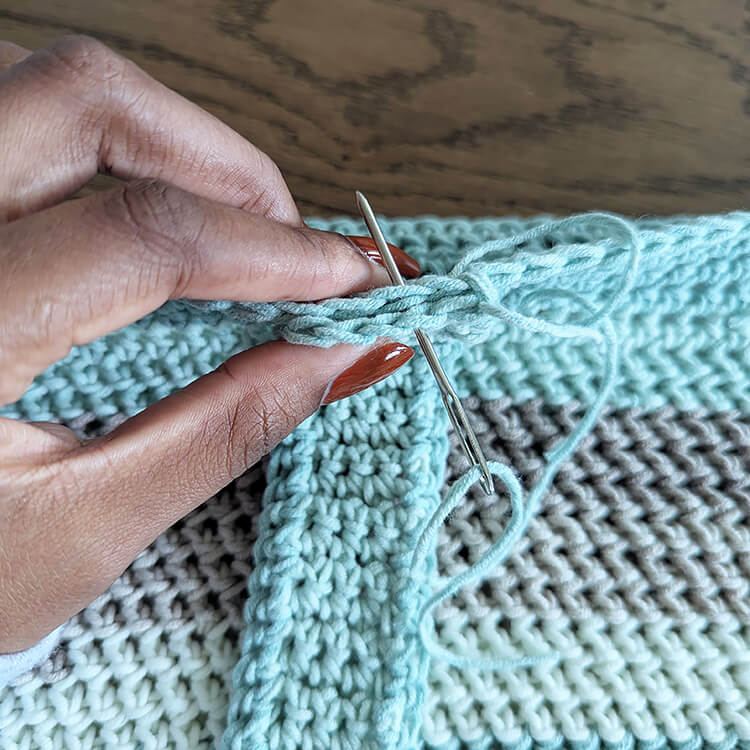
After attaching your first strap, turn the tote over and repeat the same process for the other strap. There you have it—you have successfully completed your stunning Seaside Tote!